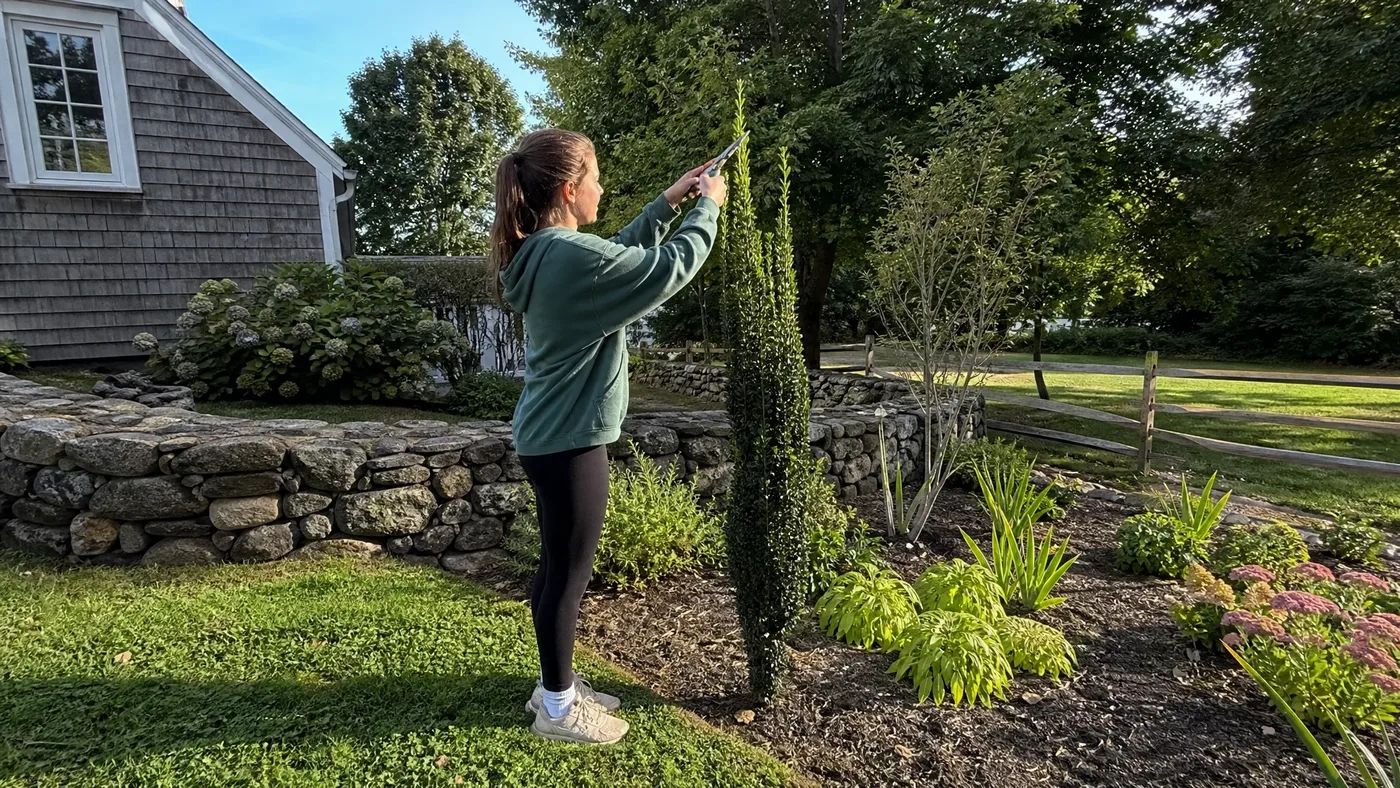
How to Prune Sky Pencil Japanese Holly Without Ruining Its Shape
It's late spring, the new growth has stopped pushing, and your Sky Pencil is standing there looking mostly fine, except for one branch that leans out and a few shoots that overshot the rest. Before you reach for the shears, know that this shrub forgives a light hand and punishes a heavy one. Cut too much and it can take years to look right again.
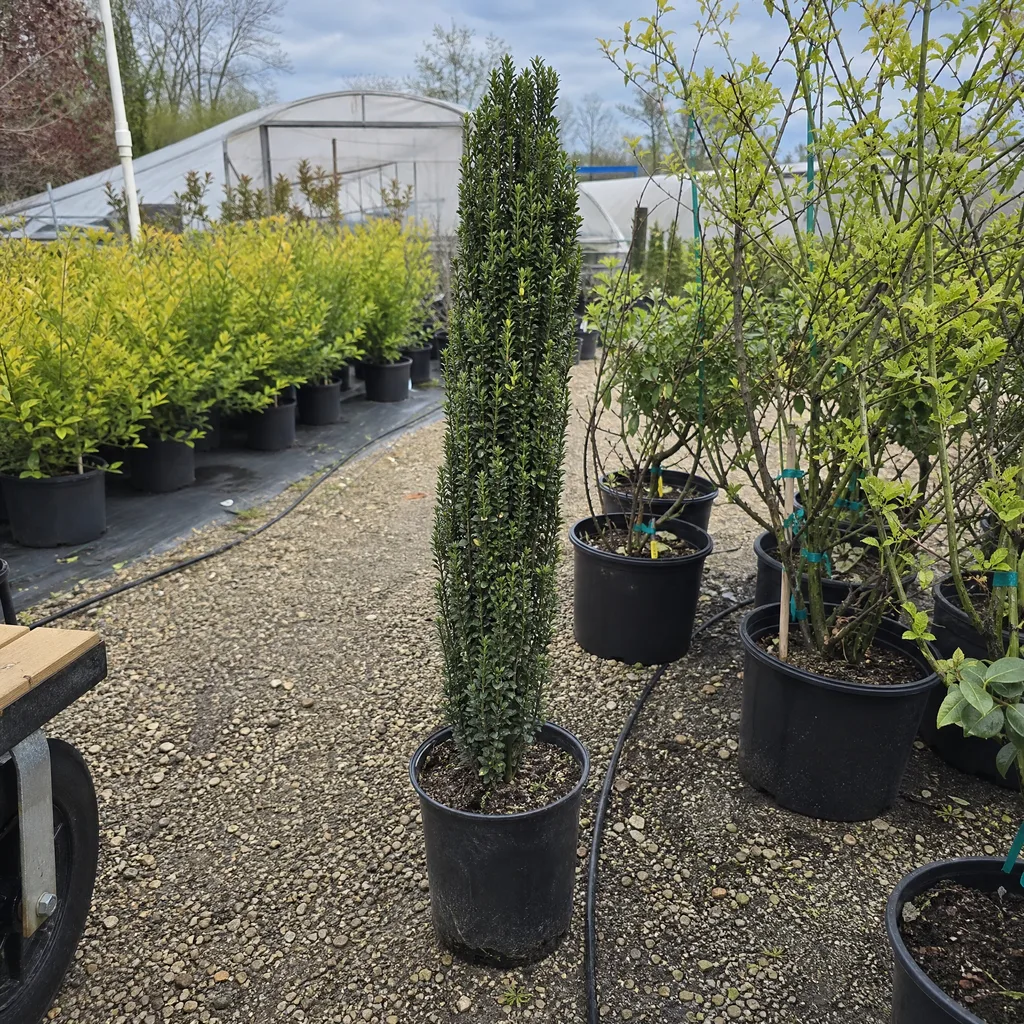
This article talks about the timing, the tools, the six cuts in order and the mistakes that ruin the shape, and answers the questions customers ask us most. Read on to learn how to keep a clean, dense green column from the first year through year five and beyond.
Why Sky Pencil Needs So Little Pruning
Start with what the plant does on its own, because that sets how much you should cut. Here is what we tell customers about its size and speed.
Sky Pencil grows slowly and is naturally columnar, with a mature width of 1 to 3 feet. Most reach 6 to 8 feet in a home landscape, according to Oregon State. Compare that with the species, which spreads 5 to 8 feet wide, and you can see why advice for other Japanese hollies doesn't carry over.
Because the plant grows so upright and densely on its own, you won't spend weekends shaping it. The real reasons to prune are to maintain density, remove damage, or correct the occasional branch that flops outward after heavy snow or ice. Light trimming in the right season keeps the foliage tight and prevents the leggy interior growth that happens when older stems get shaded out.
One common piece of advice we don't follow is to cut the top back to "make it fuller." One of the most common questions we get is whether to top a young Sky Pencil. Our answer is no. Topping leaves a blunt, stubby crown on a shrub whose whole appeal is a tapered point. In its first two years, remove only damaged wood and leave the rest alone.
Tools to Gather First
Keep your tool kit simple. Complicated equipment won't improve your results, and the right basic tools will do the job.
- Hand pruning shears (bypass secateurs, 8 to 10 inches long)
- Loppers for thicker stems (if you prune growth older than two years)
- Hedge shears or pruning saw (optional, mainly if your Sky Pencil is very tall and you're doing a larger rejuvenation)
- Clean cloth and rubbing alcohol (to disinfect tools between cuts)
- Work gloves (leather or nitrile)
- Eye protection
Sharp tools matter more than fancy ones. A dull blade crushes stems and leaves entry points for disease. Before you start, wipe your shears with rubbing alcohol to prevent spreading any foliar fungi from one plant to another.
The Best Time to Prune Sky Pencil Holly
Timing is everything with Sky Pencil. Spring flush happens first, and that's your cue. After the plant finishes its spring growth burst (roughly late spring to early summer), that's your window to do light shearing and shaping. At that point, you can see the full extent of new growth, and the plant has energy reserves to handle the cuts.
Avoid heavy pruning in late fall. Late-season cuts encourage tender new growth that can't harden off before winter cold arrives. In cold-exposed sites, winter damage shows up as bronzing or purple-tinged foliage anyway, and adding fresh tender shoots just increases injury risk. Our winter care guide covers how to protect the plant in the cold months.
If you spot broken or diseased branches anytime during the year, remove them right away. Those exceptions don't follow the seasonal rule, because a snapped limb shouldn't stay on the plant. Healthy pieces can still become new plants through semi-hardwood cuttings.
Step-by-Step Pruning Instructions
Work through these six steps in order, once a year, after the spring flush. Most years you will stop after step two or three.
Step 1: Assess the Plant Before Cutting
Walk around your Sky Pencil from all angles. Look for branches that angle outward more than 3 to 4 inches from the center line, any dead wood, crossing branches, or areas where growth is noticeably thinner inside. Mark those spots mentally (or with tape if the shrub is very tall). This five-minute walk-around prevents you from making cuts you'll regret.
Step 2: Remove Any Dead, Diseased, or Damaged Wood
Start by cutting out the obvious problems. Dead branches don't bend. They snap or feel hollow. Diseased wood may show black spots, oozing, or soft rot at the base. Cut these all the way back to healthy tissue or to the branch collar if they're thick enough. Dispose of diseased prunings in your trash, not the compost pile.
Step 3: Open Up the Interior Gently
Sky Pencil can accumulate older, leafless stems inside if the shrub isn't getting enough light. Look into the canopy. If you see bare wood and dull foliage on lower interior branches, thin out a few of the oldest stems by cutting them back to the base or to a side branch. Remove only the thickest, oldest stems. You're aiming to let light in, not to strip half the plant bare. Usually this means removing just one or two old canes per shrub, not ten.
Step 4: Lightly Shear the Outer Edges
Once dead wood is gone, step back. Sky Pencil's natural shape is your goal. If the shrub is already holding a tight, narrow form, you may not need to do anything here. If you see branches poking outward, use hand pruning shears to cut those back about 2 to 3 inches to the nearest leaf cluster. Make your cuts just above a leaf node, never leaving a stub.
Step 5: Prune for Shape and Structure
If your Sky Pencil is leaning or splaying outward (common in low light or after heavy snow), you can gently correct this. Prune branches on the outer side of the lean back by 3 to 4 inches to encourage more upright growth from interior buds. This is subtle, so don't try to reshape the whole plant in one year.
The narrow columnar form is built into the plant, and you're just removing the bits that escaped the plan. If the lean comes from too little light, our sun requirements guide will help you decide whether to move it.
Step 6: Step Back and Look
Pruning is cumulative. After each round of cuts, step back 10 feet and look at the silhouette. The goal is a clean vertical line with no obvious gaps or lumps. If the plant looks balanced and proportional, you're done. If you see an odd hole or branch still sticking out, make one more targeted cut. Stop before you think you're finished. Sky Pencil is forgiving, but regrowth takes time on a slow grower.
Tips to Avoid Common Pruning Mistakes
In our rows, the same few errors show up again and again. Here are the ones that cost customers the most time.
Don't Prune Too Hard or Too Often
Over-pruning opens up the shrub and removes foliage that the plant needs to grow. If you prune heavily every season, you encourage the very problems you're trying to prevent: leggy lower branches, sparse interior, and a plant that looks scalped. Once a year, after spring flush, is plenty.
Don't Shear the Top Flat
Sky Pencil is a columnar accent shrub, not a formal hedge. Shearing it like boxwood or privet creates an unnatural, bulbous top that's heavy and prone to splaying. Let the top taper naturally. A pencil shape tapers, and so should your pruning.
Don't Ignore Internal Leggy Growth
If light is poor, the interior of the plant will gradually go bare. Waiting until the problem is obvious means larger cuts are needed later. A little thinning every couple of years keeps air and light moving through the canopy.
Don't Prune Hard in Late Fall or Early Winter
New growth from late-season pruning doesn't harden off before frost. You'll have tender, damaged foliage by spring. Stick to late spring through early summer pruning. If a branch breaks in winter, remove it, but hold off on preventive pruning until the growing season resumes.
What to Expect After Pruning
Right after pruning, your Sky Pencil may look a little thin inside. That's normal. Within a few weeks, dormant buds along the cut stems will push out new leaves and fill in the gaps. As a slow-growing evergreen shrub, it won't bounce back overnight, but you should not see lasting gaps or wounds if you followed these steps. In our rows, a Sky Pencil pruned this way looks like a clean green pole by year five.
If the shrub is part of a hedge or screen, spacing changes how you approach light trimming. Plants set close together may need slightly more attention to prevent crowding, and plants spaced wider can stay almost untouched. Our spacing guide and the complete Sky Pencil Japanese Holly care guide cover both.
Quick Reference: Pruning Checklist
Use this table as a yearly reminder of what to cut, when, and how often.
| Task | Timing | Frequency | Notes |
|---|---|---|---|
| Remove dead/diseased wood | Anytime | As needed | Don't wait, because disease spreads |
| Light shearing for shape | Late spring to early summer | Once yearly | After spring flush, 2-3 inch cuts |
| Thin interior for light | Late spring to early summer | Every 2-3 years | Remove 1-2 oldest canes per plant |
| Correct lean or splaying | Late spring to early summer | As needed | Subtle cuts on the outer side |
| Avoid heavy pruning | Late fall/winter | N/A | Tender growth won't harden off |
Prune Less, and Your Sky Pencil Stays a Pencil
Sky Pencil Japanese Holly rewards a light hand. The plant is naturally narrow and upright, and it thrives on minimal intervention. Once you master the simple timing rule, late spring to early summer, and remember that less is more, keeping your Sky Pencil shaped beautifully becomes almost automatic. You'll spend less time pruning than you would with almost any other narrow columnar shrub, and your plant will look better for it.
Sky Pencil Japanese Holly
Nursery-grown Sky Pencil Japanese Holly in sizes from 1-2 ft. #1 Container, shipped to your door.
From $80.55
Shop Now →On our farms, we grow Sky Pencil in full sun with well-drained soil and steady moisture, and we leave it unsheared so it holds its natural narrow form. That's the shrub we sell, and it's why we can tell you honestly that light pruning is all it needs.