How to Plant Sky Pencil Japanese Holly the Right Way
The finished guide is below.
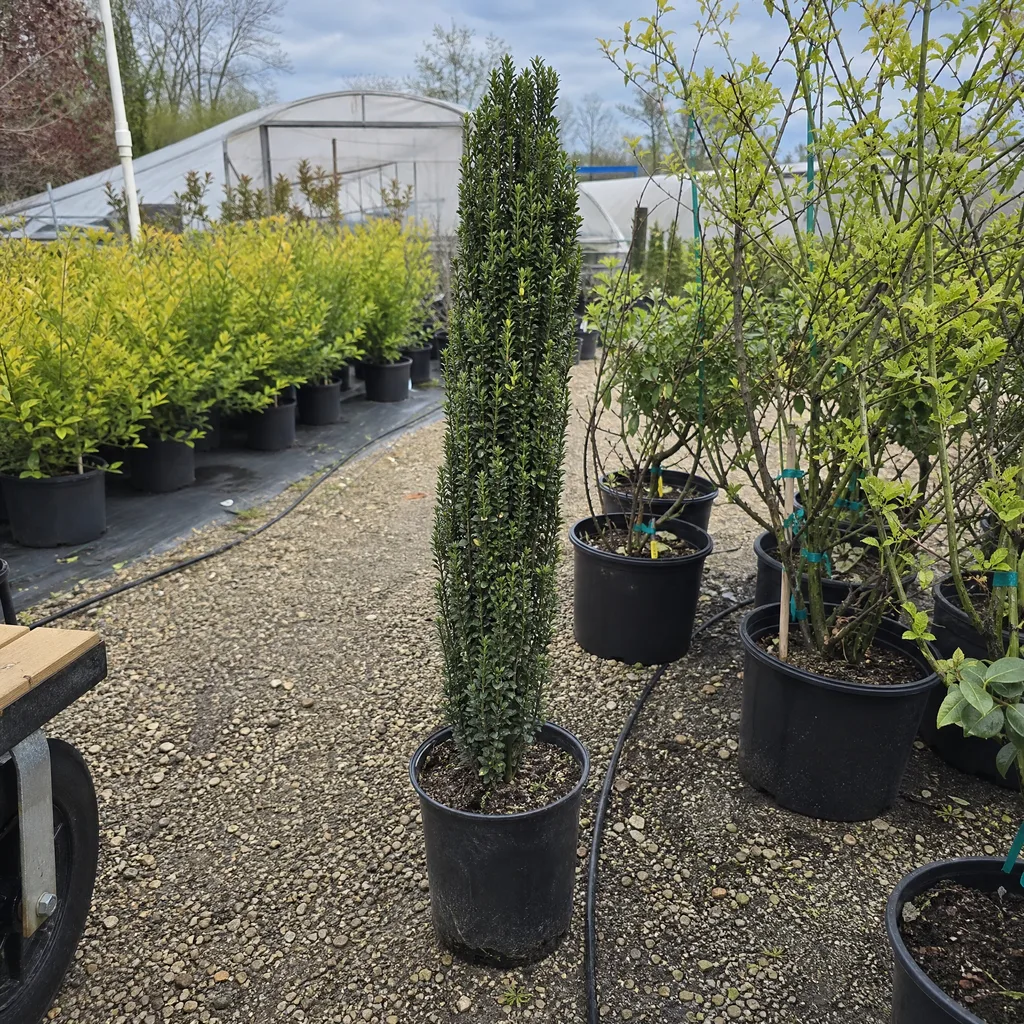
A Sky Pencil planted well gives you a slim green exclamation point that holds its shape in January and stays narrow for years. A Sky Pencil planted badly turns yellow at the base, drops leaves, and never gets the tall, tidy look you bought it for. The difference is almost always decided in the first hour, not the first season.
Most of the losses we hear about trace back to the same few errors: a root collar set too low, soil that stays wet, and a hole dug without ever checking pH. Read on for the mistakes behind most failures, plus site and timing, soil preparation, the six planting steps, and what to expect in the first season and by year five.
The Sky Pencil Planting Mistakes We See Most
These errors sit behind nearly every failed Sky Pencil. Fixing them costs nothing but a little care at the start.
Planting Too Deep
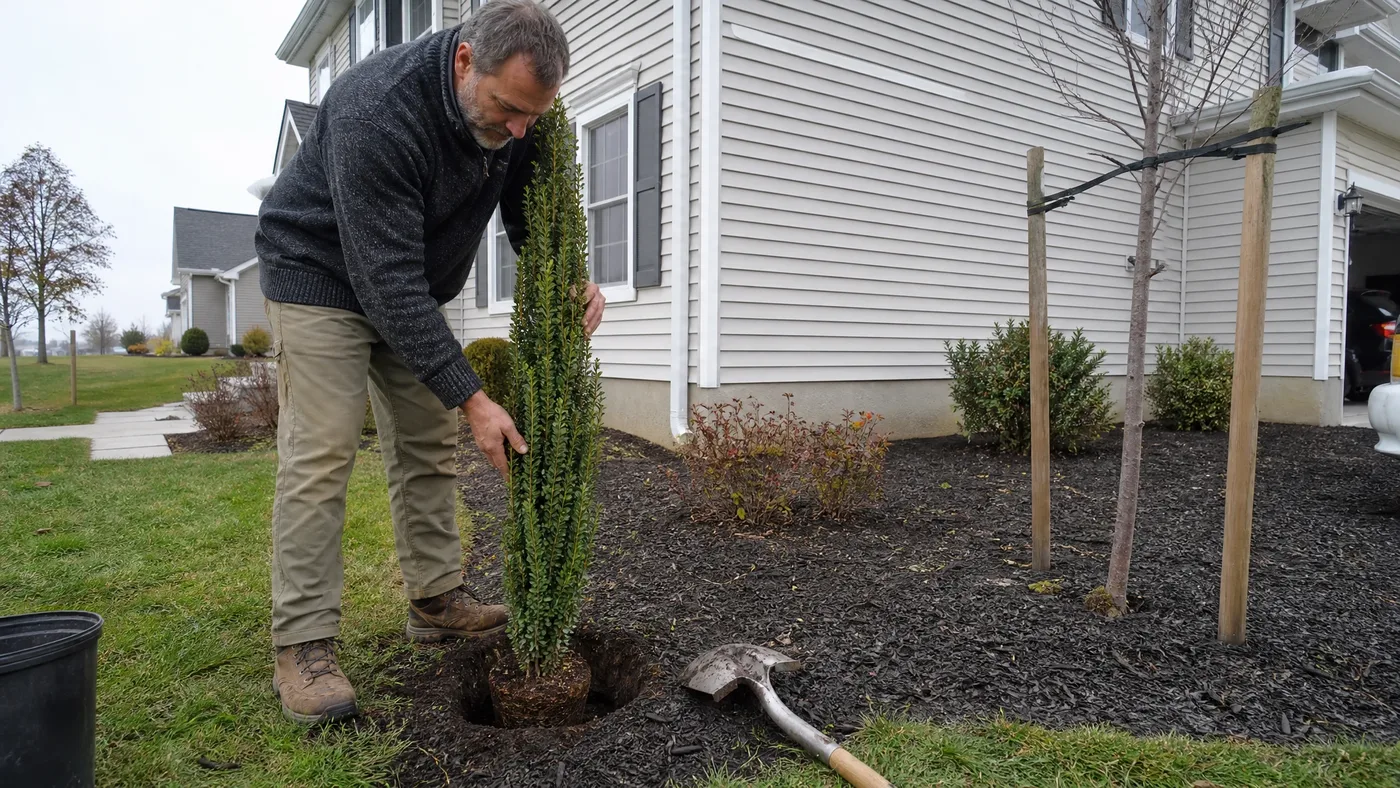
Buried root collars rot. The top of the root ball belongs at grade level. If you're nervous about the plant being unstable, stake it loosely for the first season rather than mounding soil around the base.
The most common thing we see is a hole dug to the container's depth plus a few extra inches "for good measure." The loose fill settles, and within a season the root collar sits below grade. Dig no deeper than the root ball and leave the bottom of the hole undisturbed.
Wet Soil and Poor Drainage
Sky Pencil does not tolerate waterlogged soil or prolonged drought equally. Swampy sites lead to root rot and black root rot disease. If your site stays wet after a rain, plant elsewhere or in a raised bed.
For in-ground planting, dig a test hole and fill it with water. If the water drains within 24 hours but doesn't disappear in a few minutes, your drainage is likely fine. If water pools for days or disappears in seconds, you may need to add compost or choose a different site.
Crowding and Late-Day Watering
Spacing plants closer than 1 foot apart reduces air circulation, which invites spider mites and leaf spot disease. Resist the urge to plant densely for immediate results.
Wet foliage overnight promotes fungal disease. Water at soil level in early morning instead.
Choose the Right Site and Season for Sky Pencil
A narrow plant still needs the right spot. Settle your zone, your light and your planting window before you buy.
Sky Pencil is listed for USDA zones 5a through 8b, and another source rates it hardy to zone (5) 6. What we tell customers is to count on zones 6 and 7 for dependable form. Zone 8 brings heat and humidity trouble, and zone 5 needs a sheltered spot. Our hardiness zones guide covers the details.
This is a slow grower, so you are planting for the long term. Expect a mature size of 4 to 10 feet tall and 1 to 3 feet wide. The species spreads 5 to 8 feet, but this cultivar stays a pole. Choose a site that matches that silhouette: a foundation corner, an entryway, a narrow screen along a property line, or a formal hedge where space is tight.
Sunlight Requirements
Sky Pencil takes sun to part shade. We plant it in full sun in zones 5 through 7 and give it some afternoon shade in zone 8, where heat and humidity are the problem. Along the north side of a building where light is limited, expect slower growth and a thinner, leggier stem over time. Deep shade does not suit it.
Planting Season Timing
Plant in spring or fall, avoiding peak summer heat. Spring planting (March through May in most zones) gives roots time to establish before heat stress. Fall planting (September through November) works equally well as long as you complete planting at least 6 weeks before the first hard freeze in your area. This allows roots to settle in before winter dormancy.
Prepare the Soil Before You Plant Sky Pencil
Soil is where most slow declines begin, so check it before you dig. A pH test costs little and saves a lot of guessing.
Sky Pencil wants moist, well-drained soil high in organic matter, and it grows in acid or neutral ground. Loamy or sandy loam soils are ideal. Aim for a pH under 6.5, and read our soil and amendment guide if your ground is heavy clay or very sandy.
If you've never tested your soil, now is the time. Many extension services offer inexpensive soil testing. If your soil pH is above 6.5, your plant will struggle with chlorosis (yellow leaves with green veins) as it ages. If you have alkaline soil, consider planting in a raised bed or large container instead of amending your native soil.
You cannot fix alkaline soil with a single application of sulfur. Chlorosis from high pH is a long, slow decline. Test your soil first and amend accordingly before planting.
Plant Sky Pencil Step by Step
Once the site and soil are settled, planting takes under an hour per shrub. Work through these steps in order.
Gather Your Materials
Have everything beside the hole before you start. This is the full list for one plant.
- One nursery-grown Sky Pencil Holly (quart, 1-gallon, or 3-gallon container)
- Soil test kit or send sample to local extension service
- Compost or peat moss, 2 to 3 bags per plant
- Acid-forming fertilizer (azalea or holly formulation, optional)
- Mulch (wood chips or pine needles), 1 bag per plant
- Spade or shovel
- Hand pruners
- Watering can or hose
- Measuring tape
- Gloves
Step 1: Measure and Mark Your Planting Site
Use a measuring tape to mark the exact spot where the center of each plant will sit. For a hedge or screen, mark points 1 to 3 feet apart.
Plants set at 1 foot fill in faster, but many guides push that spacing and we don't start there for most screens. Air circulation drops, and one loss leaves a gap you can't fill.
We space most screens at 2 feet, and 3 feet gives each plant room to develop its full columnar form. Our spacing guide has layouts for different screen widths.
Step 2: Dig the Planting Hole
Dig a hole that is twice as wide as the root ball but no deeper. If your nursery plant is in a 1-gallon container, the hole should be roughly twice that diameter. The top of the root ball should sit at soil level, not buried. A buried root collar invites rot. If your soil drains poorly, planting slightly high (root ball a half-inch above grade) is safer than planting low.
Step 3: Amend the Backfill Soil
Mix your excavated soil with 40 to 50 percent compost or peat moss by volume. This improves drainage and adds the organic matter the plant craves. If your pH test came back above 6.5, add pine-bark soil amendment or a sulfur-based acidifier to the backfill according to product instructions. Do not guess at sulfur rates. Follow the soil test recommendation exactly.
Step 4: Remove the Plant from Its Container
Slide the plant gently from its pot. If roots are circling densely around the ball, use a hand pruner to make three or four vertical cuts into the outer root mass, about half an inch deep. This encourages roots to grow outward into the surrounding soil instead of continuing their spiral pattern.
Step 5: Set the Plant and Backfill
Place the root ball in the hole, keeping the plant upright. Backfill halfway with amended soil, pressing gently to remove large air pockets. Water the hole thoroughly to settle the soil, then finish backfilling. Press the soil around the base, but do not tamp hard or create a compacted mound that traps water.
Step 6: Mulch and Initial Watering
Apply 2 to 3 inches of wood-chip or pine-needle mulch around the base, keeping it a few inches away from the stem to prevent collar rot. Water deeply and thoroughly. The soil should be moist to a depth of 6 to 8 inches. If planting in fall, water once more a week later if no rain has fallen.
Caring for a New Sky Pencil: First Season and Beyond
The first year is about roots, not height. Water, feeding and pruning all work a little differently than they do for a established shrub.
Water consistently during the first growing season. Sky Pencil has low to moderate drought tolerance once established, but a newly planted specimen is vulnerable. Aim for 1 to 2 inches of water per week from rain or irrigation, whether in one session or split across the week. Let the soil dry slightly between waterings, but never let it dry completely.
Do not fertilize at planting time. Wait until early spring of the following year, then apply a light feeding with a balanced or acid-forming fertilizer formulated for hollies or azaleas. Follow label instructions for application rate.
Pruning is minimal. Resist the urge to shape the plant during its first year. The plant's naturally narrow habit does most of the work. If side branches sprawl or the stem leans, light shearing after the spring growth flush (late spring to early summer) can tidy the form. Avoid heavy pruning in late fall, which encourages tender new growth vulnerable to winter damage.
What Sky Pencil Looks Like Over the Years
Growth is slow, so judge progress by form rather than by inches gained.
The first year focuses on root establishment, not visible height gain. You may see only a few inches of new growth, or sometimes none if planting occurred late in the season. This is normal.
By year two and three, expect slow, steady growth that depends on soil quality, light and water. The plant begins to show its tight columnar form. In our rows, a five-year-old Sky Pencil is a slim green pole still short of its full height, and that is the time to confirm your spacing was right. If it wasn't, we move an established plant early.
Winter leaf bronzing is common in cold, exposed sites during the first few winters. Leaves may develop a purple or bronze tint in January and February. This is typically cosmetic and fades as temperatures warm. It does not mean the plant is dying.
For more on maintaining your plant after the first season, see our complete Sky Pencil Japanese Holly care guide.
Planting Quick Reference
Use this table as a checklist at the hole. It repeats the key numbers from the sections above.
| Task | Timing or Specification |
|---|---|
| Planting season | Spring or fall, avoid peak summer heat |
| USDA hardiness zones | 5–8 listed, 6–7 most reliable |
| Sunlight | Full sun to part shade, afternoon shade helps in zone 8 |
| Soil type | Moist, well-drained, high in organic matter (loamy or sandy loam) |
| Soil pH | Acid or neutral, aim under 6.5 |
| Spacing (hedge) | 1–3 feet apart, we favor 2 feet for most screens |
| Hole width | Twice the width of root ball |
| Hole depth | Equal to root ball height, do not bury stem |
| Backfill amendment | 40–50% compost or peat moss by volume |
| Mulch depth | 2–3 inches, keep away from stem |
| First-year watering | 1–2 inches per week from rain or irrigation |
| First-year fertilizing | None at planting, light feeding in early spring of year 2 |
| Growth rate | Slow |
| Mature height | 4–10 feet |
| Mature width | 1–3 feet (very narrow columnar) |
A Careful Start Keeps Sky Pencil Slim for Decades
Set the root collar at grade, keep the soil well drained and slightly acidic, and give each plant room to breathe. Do those three things and a slow-growing Sky Pencil rewards you with a clean vertical line in every season.
Sky Pencil Japanese Holly
Nursery-grown Sky Pencil Japanese Holly in sizes from 1-2 ft. #1 Container, shipped to your door.
From $80.55
Shop Now →As a small grower, we care about getting planting right because every Sky Pencil we sell is one we raised ourselves on our own farms, and we want yours to stay tight and green for years. We grow and sell top-quality shrubs, and a good start in the ground is where that quality shows.